

Have you heard of WebLN? It’s a growing protocol designed to make Bitcoin Lightning Network integrated websites and applications interoperable.
This post we’ll be demonstrating how to add Bitcoin Lightning Network functions to a WordPress site using the “Bitcoin Lightning Publisher” plugin by the Alby Browser Extension.
Best of all, it can be done with very little to no dev skills. I’m a project manager so if I can do this, so can you : )
Adding and configuring this plugin will allow your site to seamlessly connect to WebLN apps like the Alby Browser extension. Once connected, you can add Bitcoin Lightning paywalls, tips and boosts. If you want to see some cool sites for inspiration, check out https://stacker.news/ on a computer or https://fountain.fm/ on a mobile.
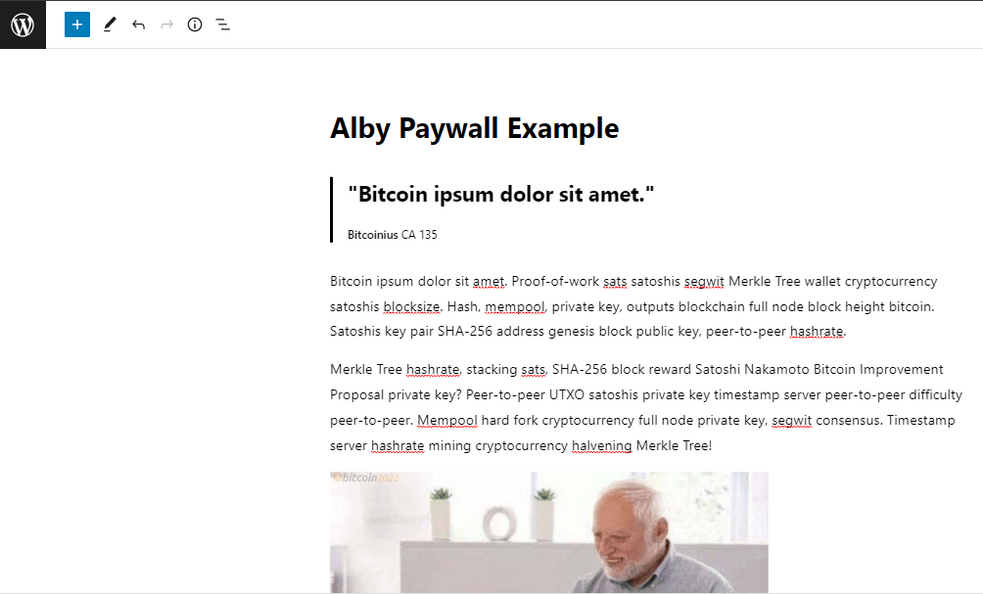
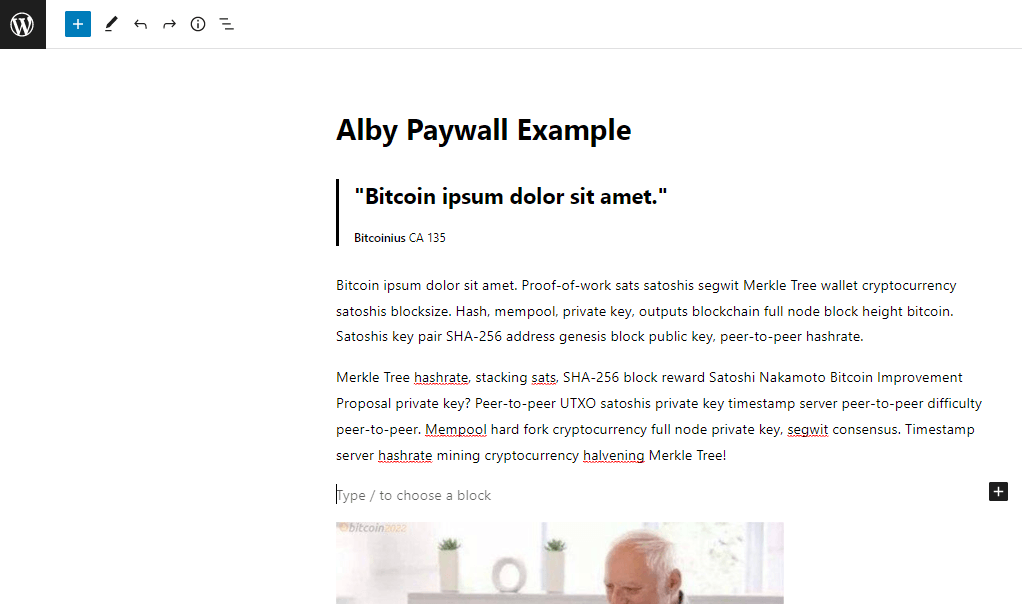
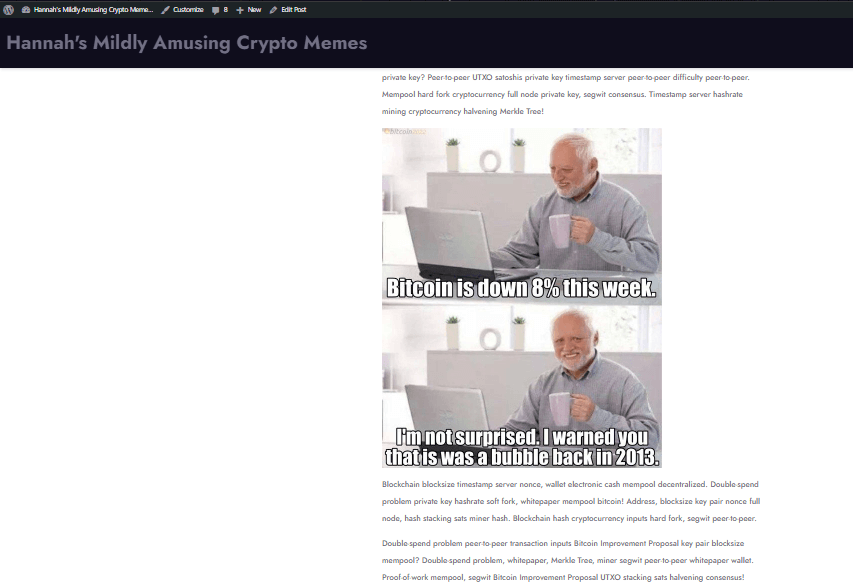
Check out our demo site to see the paywall in action. If you pay 10 satoshis (0.00025 USD) it unlocks a meme. https://innovativecommercegroup.com/alby-paywall-example/ . I put in a 10 sat donate button so you can try that out too.
Alby also put out a really cool tutorial and demo YouTube video, so be sure to check that out too.
If you want to give it a try, here’s an installation guide.
Installation Guide
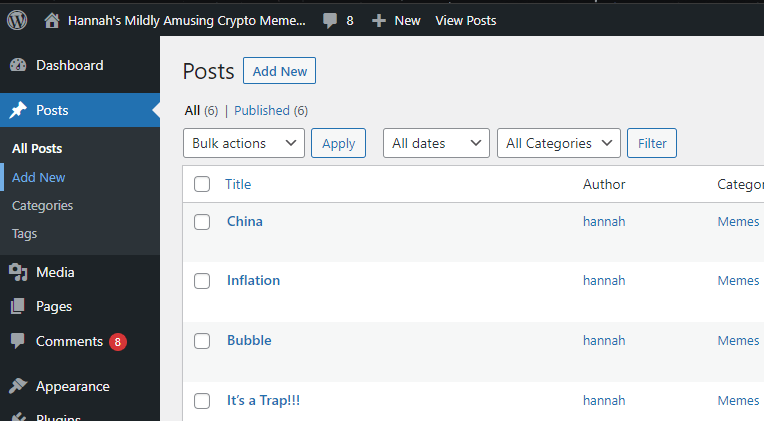
1. Make a draft blog post using WP admin sidebar Make an draft blog post using WP admin sidebar -> Posts -> “Add New”
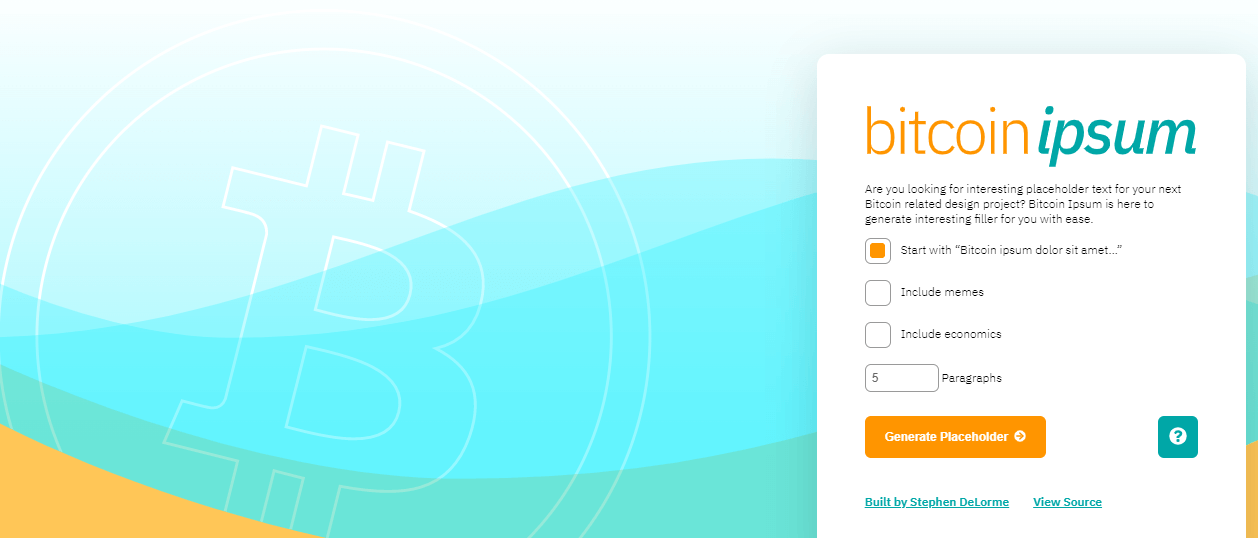
2. Add a title and some text. Why use boring old lorem ipsum when you could use bitcoin ipsum from https://bitcoinipsum.io/ ?
3. Gussy up your post a bit (obviously not totally necessary). If you like to mess around with custom html you can always use an editor like this: https://www.tutorialspoint.com/online_html_editor.php
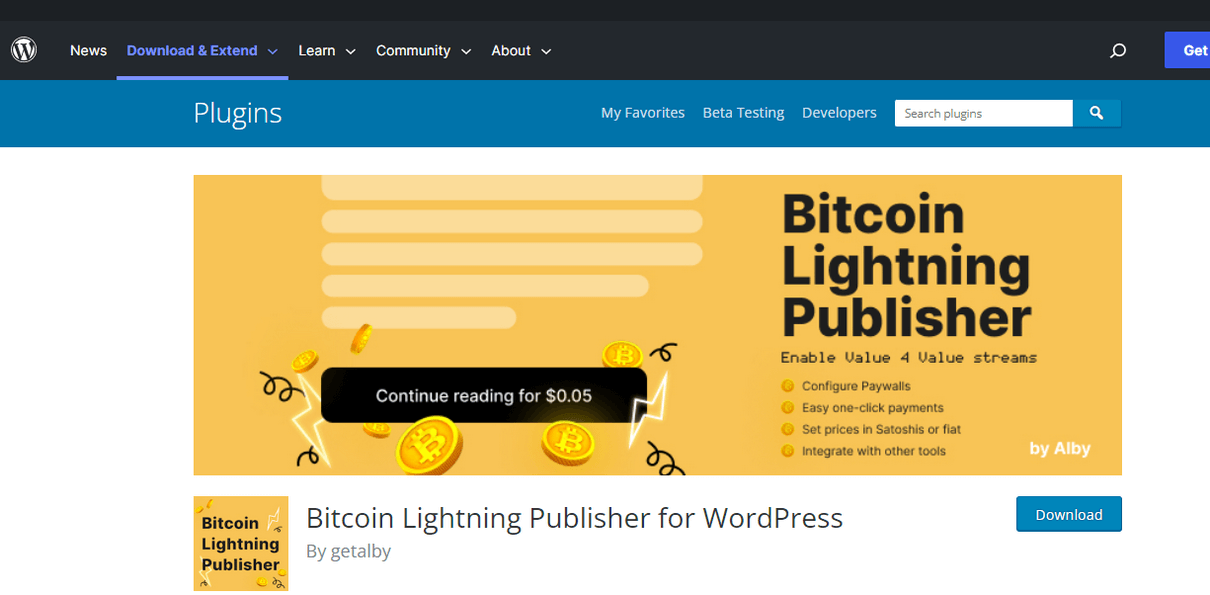
4. Download the Alby Lightning Plugin zip file from here and store it somewhere handy: https://wordpress.org/plugins/bitcoin-lightning-publisher/
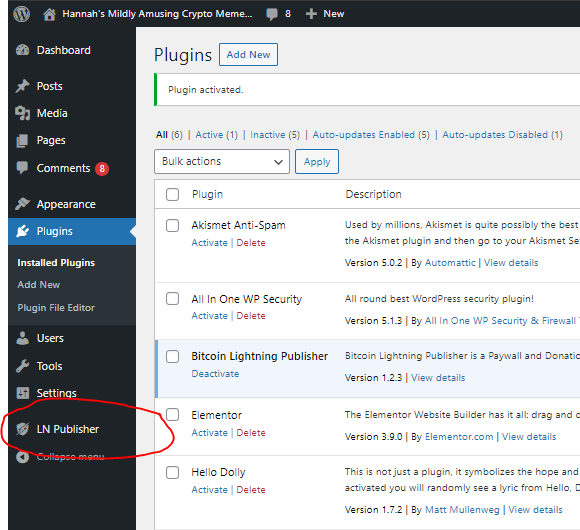
5. Install your plugin using the wp-admin panel
- -> Plugins -> “Add New”
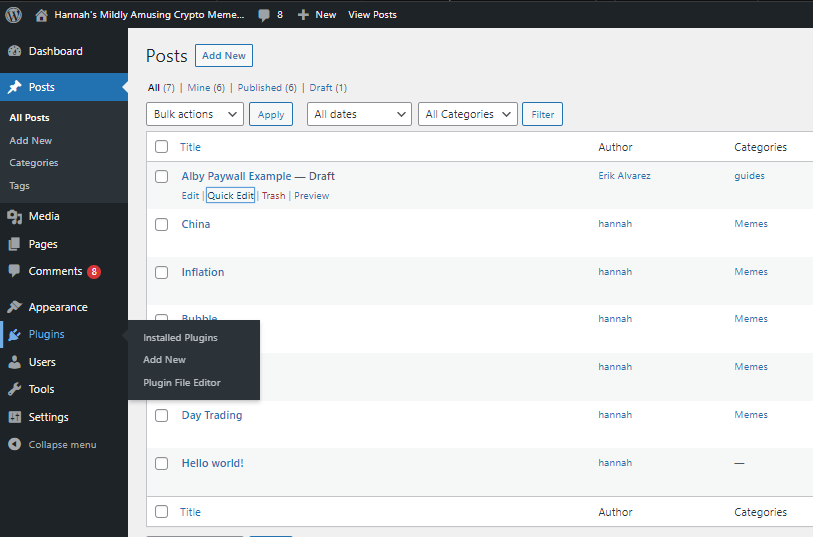
6. Install the plugin by selecting it and clicking the “Install Now” button
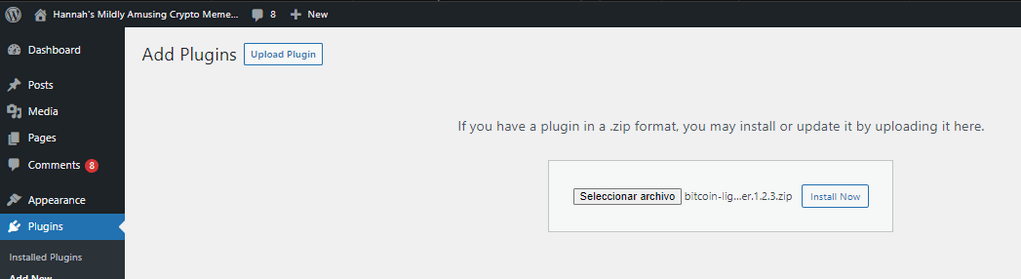
7. Did you get an error here? We got a max file size exceeded. If not, skip to step 8 : )

This was also noted here with a little investigation:
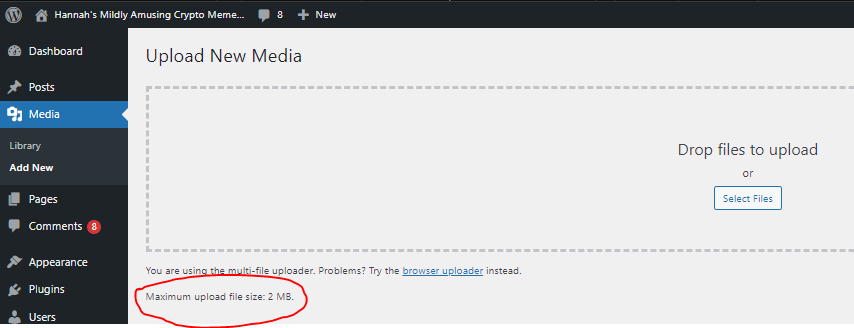
The plugin filesize is 2.7MB:

Ok so we found the source of the problem. This next step involves logging into the server and finding the php.ini file and upping the maximum file size.
Saving you (hopefully) some hassle, the php.ini file is located here on a Ubuntu server:
/etc/php/8.0/apache2
Change this max file size in php.ini using a text editor (I like nano). It’s in the “File Uploads” section. I changed this as follows:
- ; Maximum allowed size for uploaded files.
- ; http://php.net/upload-max-filesize
- upload_max_filesize = 8M
And got this error trying to save the file
[ Error writing php.ini: Permission denied ]
Ok….so try sudo : )
$ sudo nano php.ini
That saves just fine.
Now refresh the site but no change to max file size error.
So I rebooted the server. (Thinking on this again, it may work to just restart the apache system service, but I didn’t try this out).
8. Okay so we’re back and did this again (from Step 6) so this time click “Install Now” and you should have success
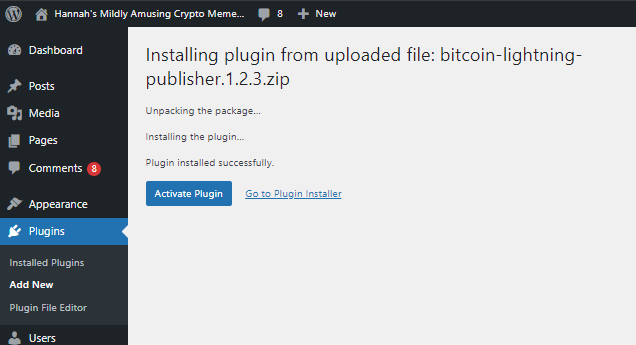
9. After successful installation click “Activate Plugin”
Success!
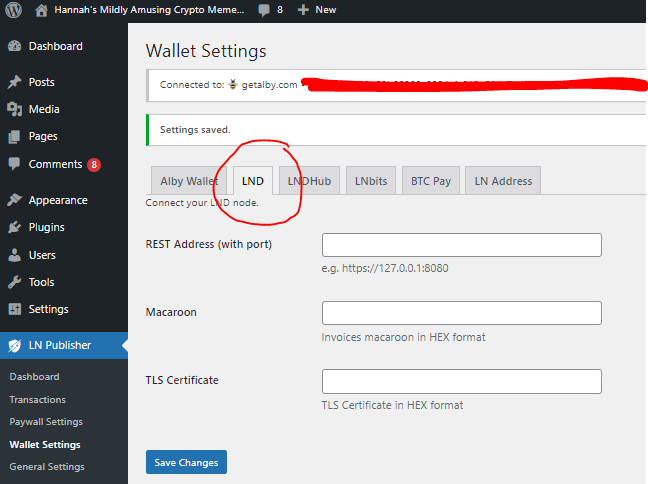
10. So now we can configure our wallet here under “Wallet Settings” :
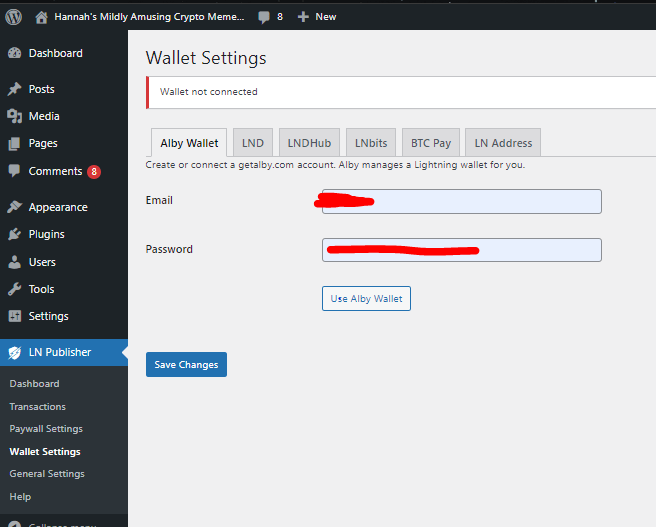
11. This is super easy to connect to an existing Alby wallet, just enter an email, password and click “Save Changes”.
Note that, if you want to use an existing Alby wallet, you need to enter the @getalby address and password for that account. For example: ealvar13@getalby.com
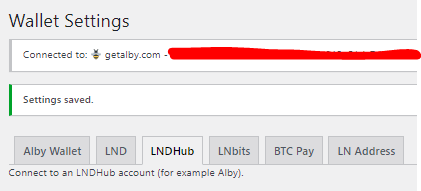
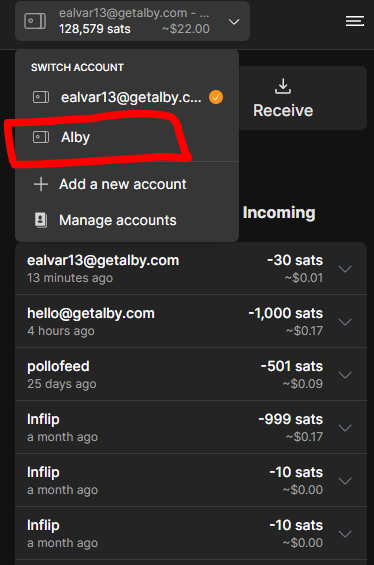
Otherwise, the plugin can automatically generate you a new wallet too. If you click “Add a new account” on your extension, and type in the credentials you used for the plugin, you will connect to the account that you just created here.
Once you’ve completed configuring your wallet, you’ll see a success message as shown here.
12. Okay now for the part we’ve been waiting for. Let’s add a Lightning paywall to our blog post! Let’s get back to our draft post:
13. Next we’ll add a block where we want the paywall (i.e. after the preview text”) and select the block type “Lightning Paywall”
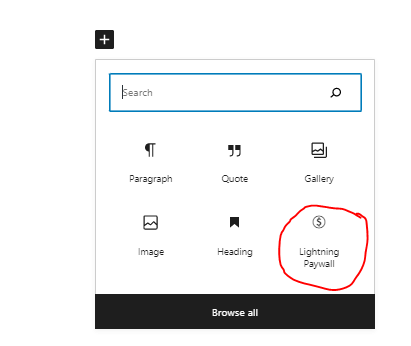
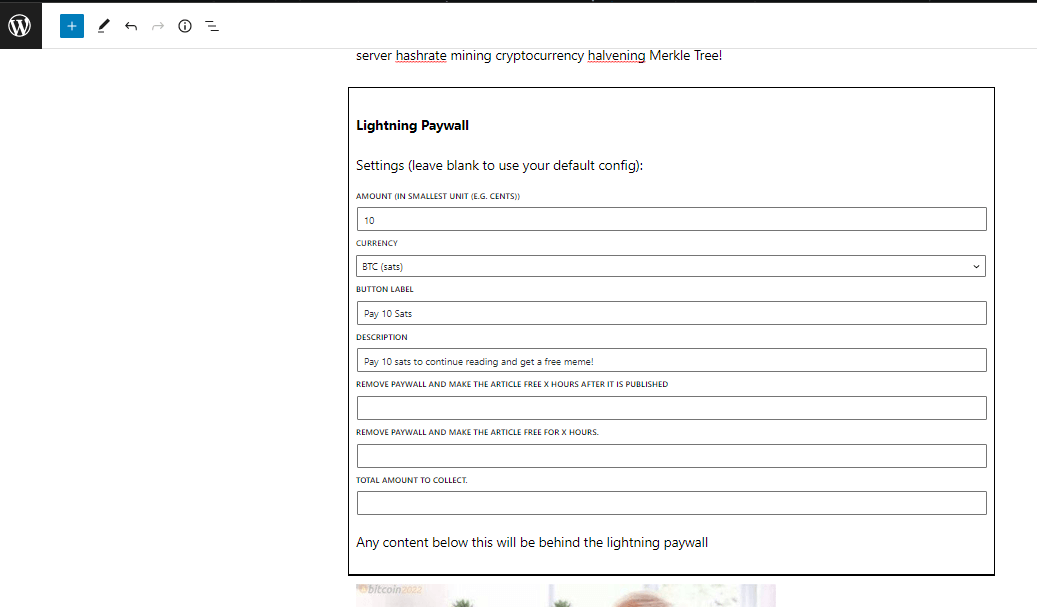
14. Let’s configure this now for 10 sats to read:
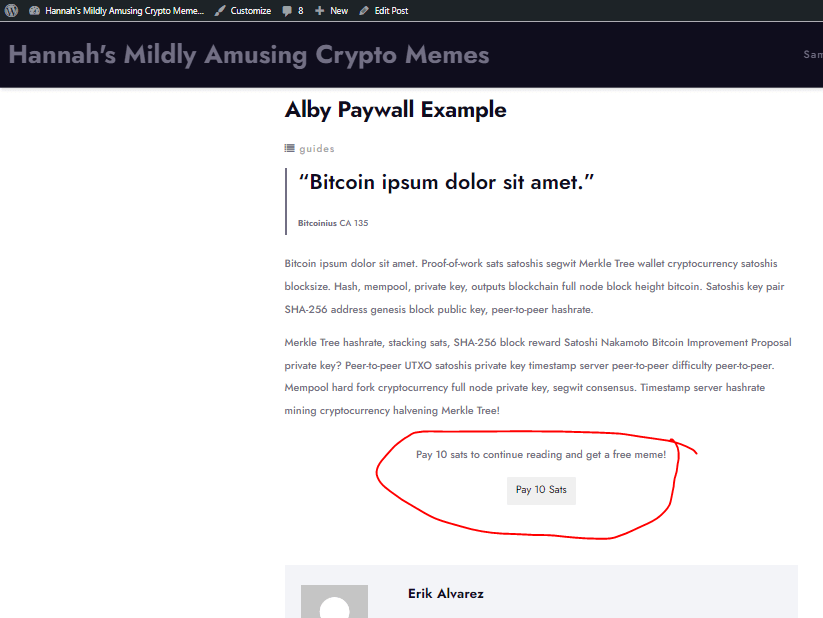
15. Testing it out in a preview and it’s working!
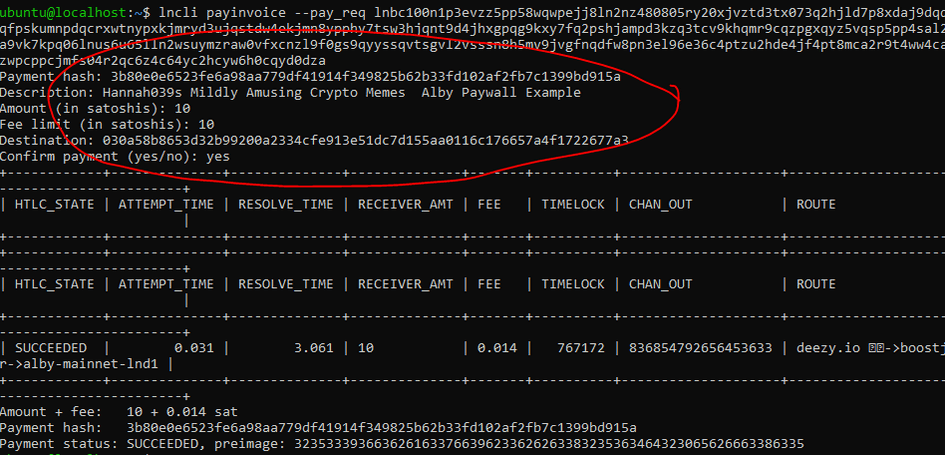
16. I tested these payments both with a Muun Wallet and our own LND node. Both payments succeeded lightning fast ⚡🙄
17. And…drum roll…it unlocks our content!
18. Possible source of errors that I experienced:
Weirdly, I didn’t see these funds being received in the connected Alby wallet. I tried this a couple of times with no luck.
Investigating this with the help of their Telegram support channel, I found out that when I used the email associated with my existing Alby account (i.e. not the user@getalby.com email, rather the one saved in your settings) results in creation of a new wallet account.
If you click “Add a new account” on your extension, and type in the credentials you used for the plugin, you will connect to the account that has the *missing* sats.
19. If you’re feeling adventurous and want to connect your LND node. We can do that here too!
Conclusion:
Hopefully you found this post useful and it has inspired you to build some WebLN functions into your website! Building websites on micropayments versus subscription models has the potential to reshape the internet.
It’s great fun to see all these new tools to make developing for Bitcoin Lightning much more user friendly.
We’re using some of this functionality on a site build with cryptochicago.com . Watch this space for some cool new features coming soon.
If you’re inspired to build a Bitcoin Lightning enabled website or a mobile app, we’d love to hear about it. Hit us up and let us know!
References:
https://blog.getalby.com/lightning-on-wordpress-with-the-alby-plugin/
How to Fix the uploaded file exceeds the upload_max_filesize directive in php.ini Error

0 Comments